
Table of Contents
Import invoices
Review scanned data
Process Invoices to claims for review
Auto Process
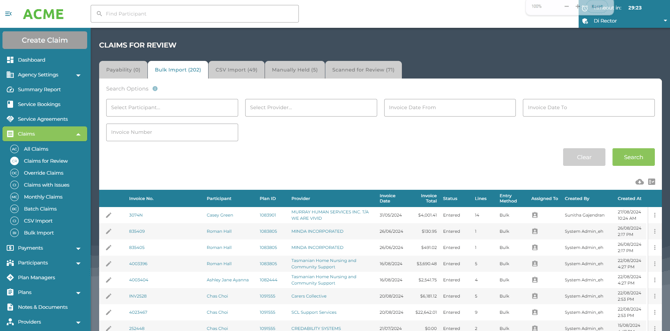
Claims > Bulk Import
Planability offers a convenient bulk import tool that is both speedy and accurate, allowing you to easily drag and drop multiple (or single) invoices for simultaneous processing.
With the Bulk Import tool, you can scan up to 50 invoices at once, regardless of the providers or participants they belong to. This tool automatically recognises both the provider and participant based on the ABN and the NDIS number on the invoice, minimising the chance of input errors.
The scanning tool can identify different claim types such as non face-to-face and cancellations; automatically adjusts rounding errors, and will even convert minutes to decimals!
Bulk scanning is accessible to all users. If you typically use scanning to generate individual claims we recommend you try the Bulk Import feature for further efficiencies.
Import Invoices
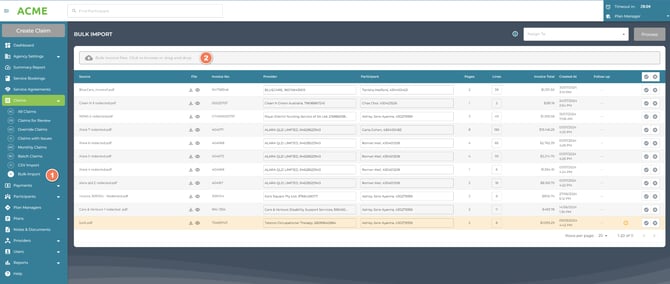
- From the main dashboard, select Claims > Bulk Import
- You can either click on the File Import field or drag and drop invoices from your email inbox or folder. Supported file types are: pdf, jpg, jpeg, png
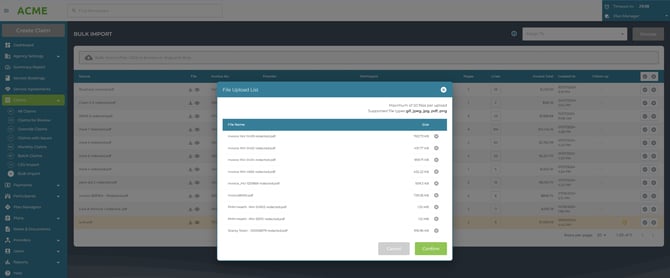
- Click to Confirm your file selection. This will upload the selected files to Planability to start the scanning process.
Review Scanned Data
It is important to note that the data shown on the Bulk Import dashboard is 'read only'. You can view the imported file - the invoice, and you can select a participant or provider if they have not been identified from the scan, but you cannot edit the claim line data.
This view allows you to confirm that you wish to create a claim from each scanned invoice and you can assign it to a user in your account to process.

- If an invoice is identified as a duplicate invoice number for the Provider, an alert will display stating ‘The Invoice (xxxxx) from {provider name} has already been used’, with a link to the existing claim. A duplicate can only be detected once a claim has been created. If the same invoice is scanned multiple times in the Bulk Import dashboard but no claim has been created yet, no alert will appear at that stage. Once the related claims are created, any duplicates will display a duplicate invoice alert.

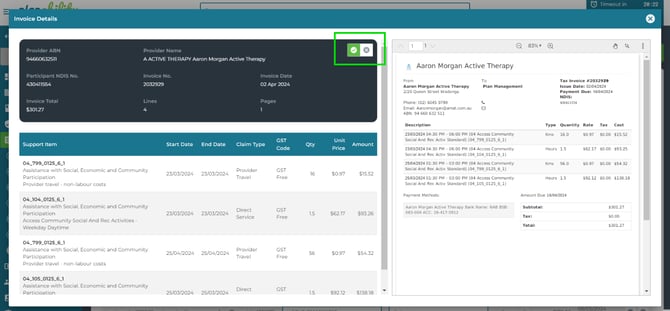
- Review the data extracted by clicking the numbered box in the Lines column.
- The participant is identified based on their NDIS number, not their name. If the NDIS number is not present on the invoice, the participant will not be automatically identified. In such cases, you can manually select the participant from the dashboard.
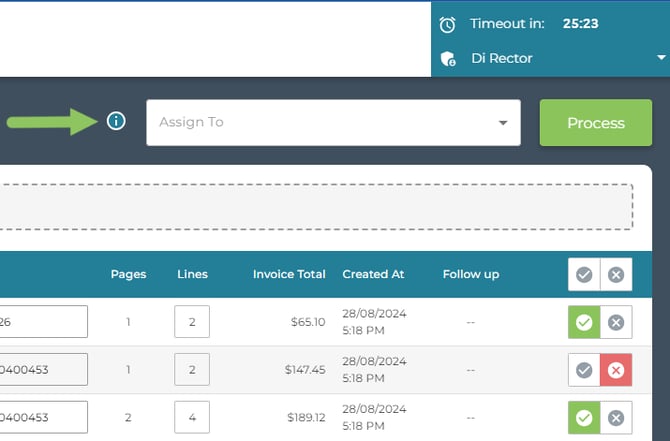
- When reviewing the Invoice Details, you can use the selections highlighted below to confirm whether this claim should be processed or deleted from Planability. When you close the pop up and return to the dashboard your selection will be saved.
- You can also select the invoices to be processed or deleted from the Bulk Import dashboard.
Process Invoices to Claims for Review
Invoices scanned in the Bulk Import Dashboard need to be processed to either create a Claim or to be deleted out of Planability.
|
 |
|
 |
|
 |
All claims that are created from Bulk Import will be held for review in Claims > Claims for Review - in the Bulk Import tab
-
Navigate to Claims > Claims for Review to review each claim prior to submitting.
Read: Claims for Review
Bulk Import - auto process invoices to Claims for Review
Providers whose invoices require no reviewing in the Bulk Import Dashboard before processing to Claims for Review can be selected to 'Auto Process Invoices'.
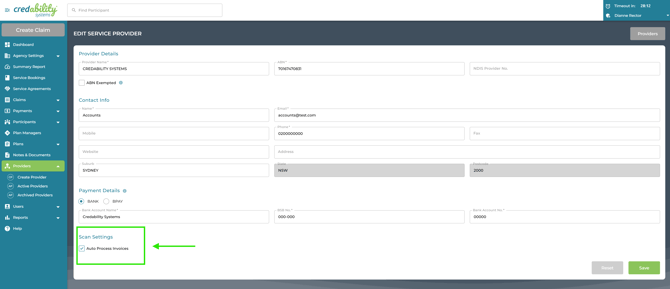
When they are scanned through the Bulk Import Dashboard, they will automatically process to Claims > Claims for Review - Bulk Import tab
This enhancement reduces processing time for agencies using bulk upload and mailbox ingestion methods.
All processed claims will now be available for Review prior to submitting to the NDIS.
Read: Review Claims
Next Article: Create Claims: Mailbox Ingestion