
Table of Contents|
Create Claim - Provider Claim
Provider Claim - Scan
Provider Claim - Manual Input
Add Claim Lines
Create Claim - Reimbursement
Select Service Booking (required if there are two Service Bookings - a Stated Item and a Category Service Booking)
Create a single Claim - Overview
You can start a new claim from any page or view in the platform using the Create Claim Button at the top of the left menu.
Hover over the Create Claim button and choose to enter a claim for either a Provider or a Participant reimbursement.

Create Claim - Provider Claim
- Upload the Invoice file by drag and drop into the Select File field, or click on the
 icon to browse for the file. The Invoice will display in the File Preview.
 - Enter the Participant name.
- The most current plan will be selected by default. If the claim relates to an earlier plan, select it from the Plan pull down option.

Choose either Manual Input or Scan to create the claim lines.
Create Claim - Scan
- Enter the Provider name (by either name or ABN). The ABN and bank details will display so that you can check them against the details given on the invoice.
- The Invoice Date and Invoice number are not mandatory when scanning. This information will be extracted from the Invoice when scanned.
- If there is a Service Agreement entered for this Provider, you will have the option to 'Use Provider Service Agreement'. Any claim lines that match the Service Agreement will draw from the quarantined funds for this provider.
- Click Save & Create Another to create the next claim; or Save & Wait to view the Claim Details page.

- The created claim can be reviewed from Claims > Claims for Review - Scanned for Review tab
See: Claims for Review
Create Claim - Manual Input
- Enter the Provider name (by either name or ABN). The ABN and bank details will display so that you can check them against the details given on the invoice.
- Enter the Invoice date and number.

TIP: When entering the invoice number, we recommend using the same invoice number convention as used on the invoice.. eg. If the invoice number is INV-5351 enter the whole reference - INV-5351, not 5351. This will ensure that any duplication of invoices is picked up, whether entered manually or scanned.
- If there is a Service Agreement entered for this Provider, you will have the option to 'Use Provider Service Agreement'. Any claim lines that match the Service Agreement will draw from the quarantined funds for this provider.
- Click Next.
You will now be viewing the Claim Edit page where you can add claim lines.

The Claim Edit page shows the Claim information (invoice number, participant, provider, claim status); the Document Preview which is the invoice that has been uploaded to Planability, and the Added Services - the claim lines.
TIP: you can access the Claim Edit page from your All Claims or Claims for Review listing by clicking on the buttons to the right of the claim line and selecting to Edit.
Add Claim Line
There are two methods of adding claim lines:
- In-line - Add Claim Line
- Modal popup - Add Claim Line
In-line method:
Enter claim lines quickly from the Claim Edit page.
- Start by entering part or all of a support code
- Select the correct item from the filtered list
- [Tab] to the date fields and enter start and end dates (select from the calendar date picker if preferred)
- Claim Type (field will default to Direct Service or pre-set claim type). Edit if required
- GST will default to GST Free. Edit if required
- [Tab] to Qty and enter units
- [Tab] to Unit Price and enter rate. Click on the $ to select the NDIS Price Limit for this item
- The Claim amount and Pay Amount will be calculated and display.
- [Tab] [Tab] to Add and [Enter]
- Repeat for any additional claim lines.

Modal Pop Up - add claim line
If you prefer not to add claim lines using the in-line method, you have the option to add lines through a pop-up form.
If the in-line method is open, simply click on cancel to close it, and then select Add Line to access the pop-up form.

NOTE: Claims are submitted using NDIS APIs, which have a rule that says you cannot claim the same Support Item, GST and Claim Type on the same invoice. If you did, it would be rejected at the time of claim. In some cases, this is needed, for example, when you might need to claim a few extra cents to solve the rounding up calculation issue. So, we're allowing that to happen in our claim line item entry, and we'll pass that through to NDIS with an appendix to the invoice number of #P01 or #P02 (as many as you need) when you review that claim in PRODA or reference it in the Remittance advice from the NDIA. On the Planability claim, it will just appear as another line item in the same invoice claim.
When you add a line that is a duplicate of an existing one, you will be warned with this pop-up:

- When adding or entering a claim line, the Service booking number will display, along with Remaining Available Budget for this category and any unavailable budget (due to pending claims or Service Agreements)

Select Service Booking
If you are entering a claim for a stated item and there is more than one Service Booking (ie., one for the Stated Item and one for the Category, you will need to select the correct Service Booking. An * after the Service Booking number denotes that it is for a Stated Item:
In-line enter / edit - select Service Booking

Modal enter / edit - select Service Booking
TIP: Use the Clone feature to quickly clone a claim line. The dates and Support Category will be cloned reducing the number of fields you need to complete.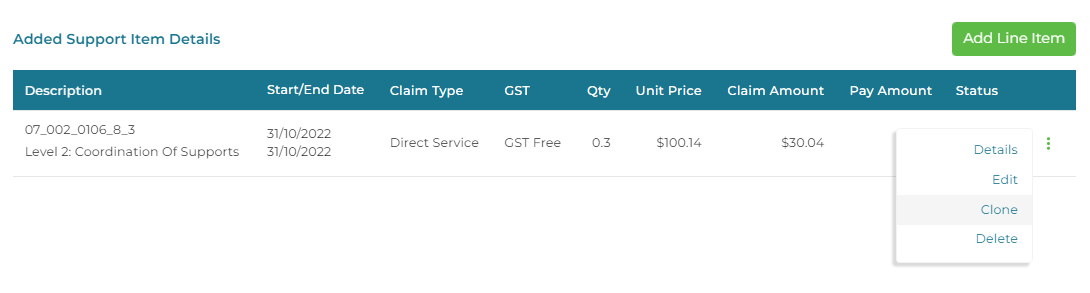
Next Article: Review Claim