When should you use the Scan feature, and what should you expect?
Claims can be entered manually or scanned. Scanning is generally a much faster process, especially for multi-line invoices.
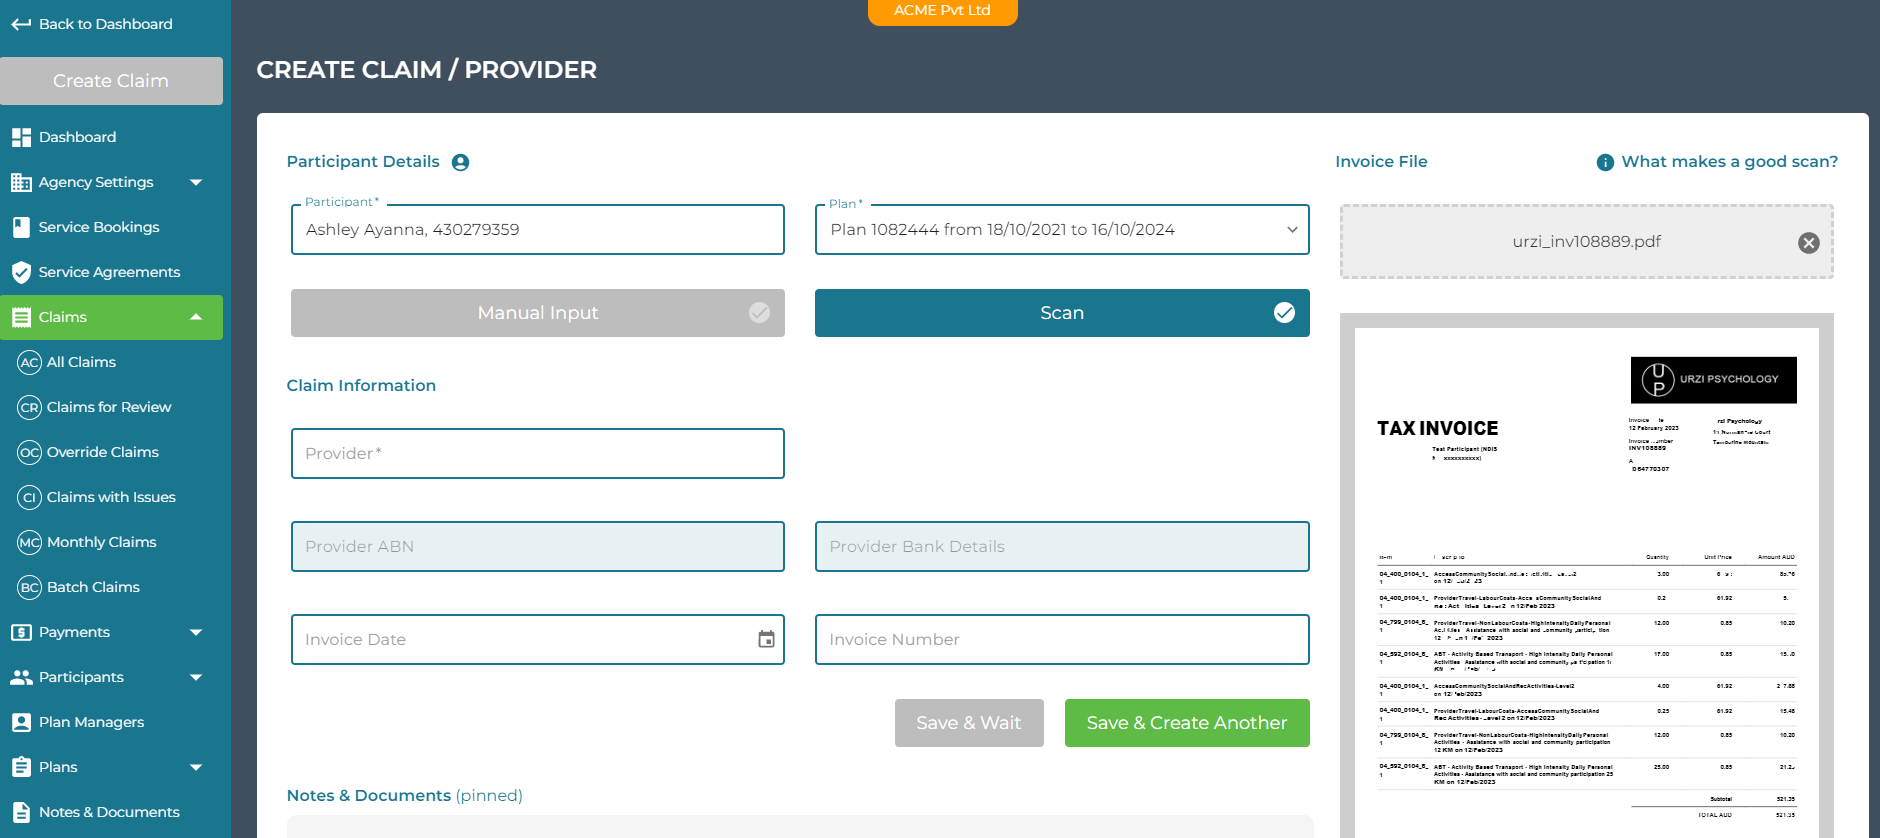
After you have uploaded the invoice to the Claim where you can view it, decide which option will be most suitable and efficient.
For more information on how to create a claim by scanning go to: Create a Claim
What should you expect when you scan?
A scanned invoice will create a claim in Planability showing each support item and it's aggregated total. Multi-page invoices may reduce down to just a few claim lines once aggregated.
The best results come from invoices that include - on each line of the invoice - all the information we need to create a claim line.
eg:
Support Item Code | Dates of Service | Quantity | Unit Price | Total
The information does not need to be in that order, but for Planability to be able to create a complete claim line, we do need to be able to capture that information.
If some details are missing on the invoice, don't worry, because you will be able to edit the claim.
All scanned claims are held in Claims for Review for easy access. For speed, we recommend you click to edit the claim by selecting Edit from the ellipses buttons to the right of the claim.
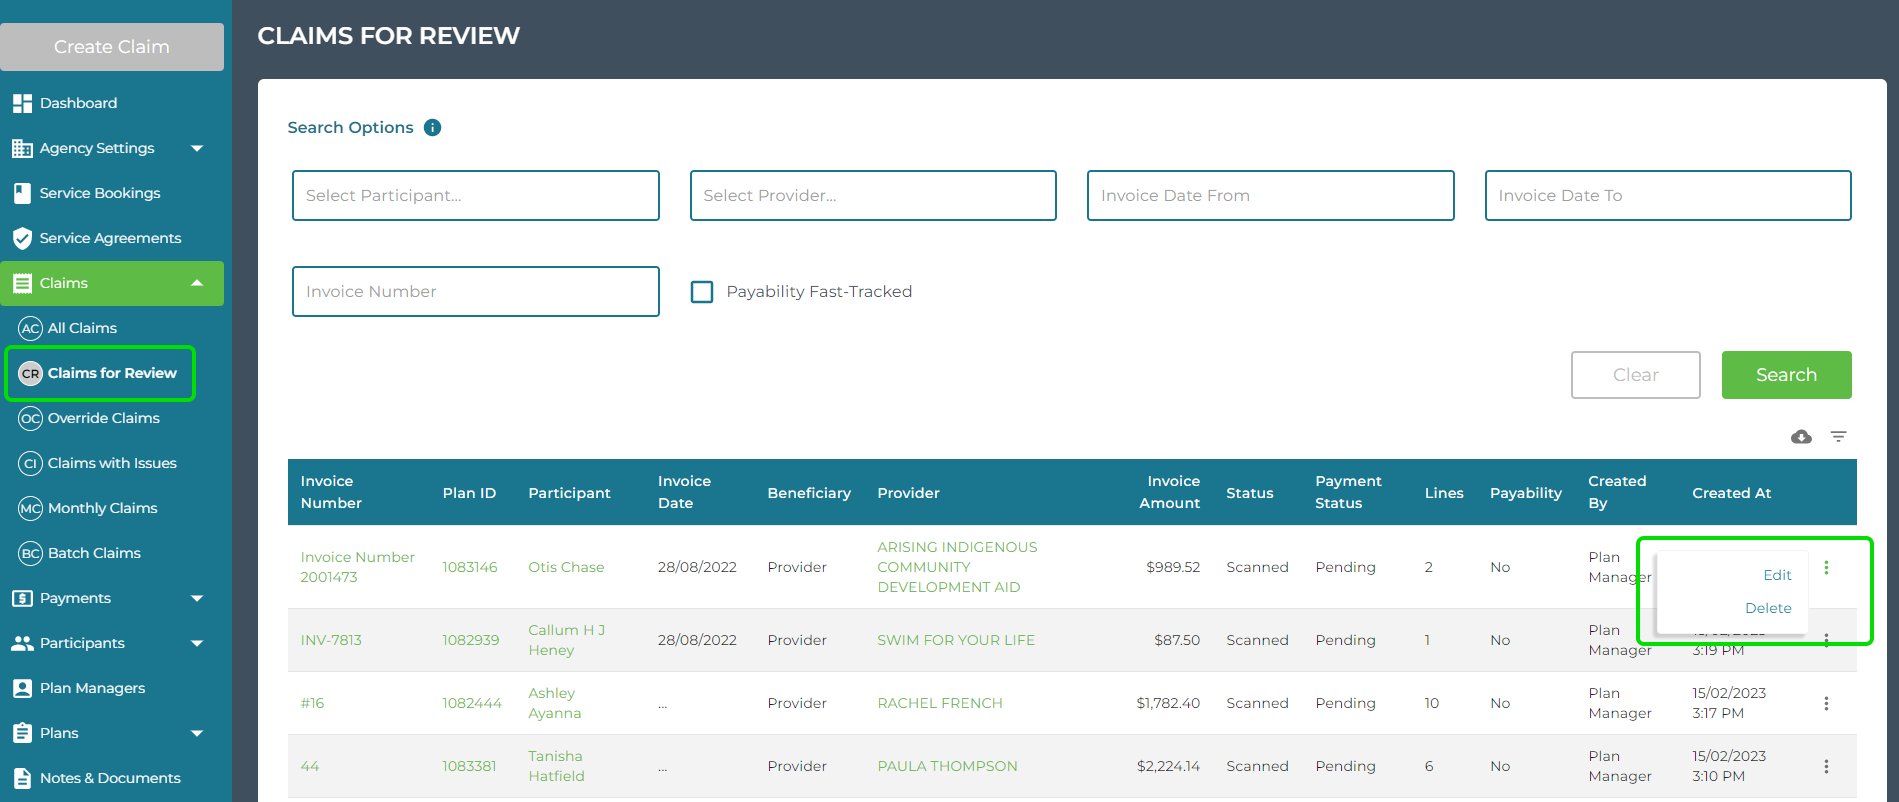
You can then review the claim lines alongside the image of the invoice and edit if required.
What if the scan results are poor or return no claim lines?
Many invoices will scan well, but some invoices, because of their layout, require adjusted settings to enable the data to be extracted with minimum adjustment required by you.
Invoices with a Summary section are a good example of this. We can apply a setting for the provider so that the invoice lines and total are not doubled.
We suggest you submit a support ticket to support@credsys.com.au stating the Provider name and Invoice Number so that we can work to improve scan results for you.
Read also: Bulk Scanning